Getting started & setup
Sign in, set up your workspace, invite your bookkeeper, and create your first contract so Function TimeTrack can price your weeks correctly.
Function TimeTrack turns the reality of a freelance entertainment week — the calls you worked, the meals you took, the holidays that happened to land on a shoot day — into an accurate, contract-correct paycheck estimate. Before the numbers can come out right, the app needs three things: an account, a workspace, and at least one contract.
This guide walks you through that first-time setup, step by step. It should take about ten minutes, and you only do most of it once.
Who this is for
Whether you are a freelance crew member setting up your own books or a bookkeeper being invited into someone else's, the flow is the same — you sign in, land in a workspace, and start entering your paper. The parts that differ (like who can invite members) are called out along the way.
Step 1 — Sign in
Function TimeTrack signs you in with your Google account. There is no separate password to create or remember.
- Go to the sign-in page.
- Click Continue with Google.
- Choose the Google account you want to use and approve the permission prompt.
Google creates your account automatically the first time you sign in, so "sign up" and "sign in" are the same button. When it succeeds, you land on your dashboard.
Use a consistent Google account
Pick one Google account and stick with it. Because your account is tied to that Google login, signing in later with a different Google address creates a separate, empty account — not a second way into the same data. If you share books with a bookkeeper, invite them as a member (Step 4) rather than sharing one login.
Sign-in & security
Settings → Sign-in & security holds four tabs: Sign-in, Devices, Activity log and API keys.
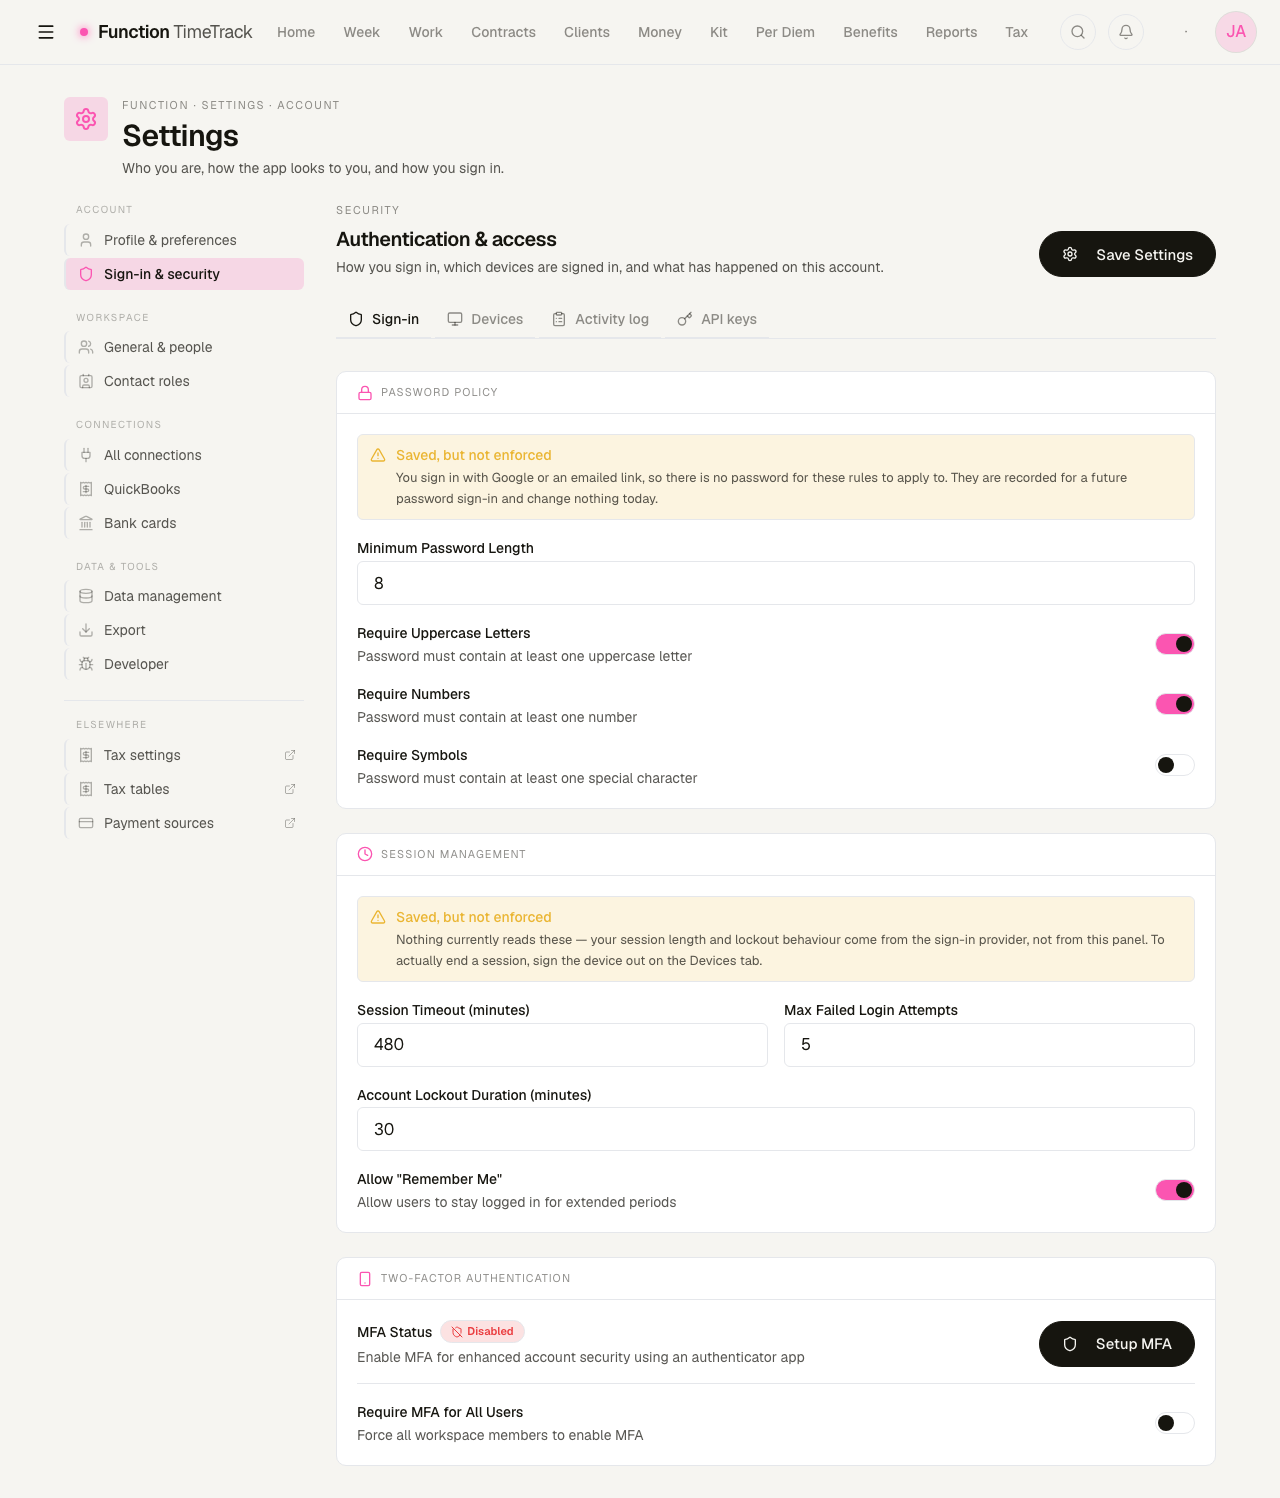
Two of these panels say so themselves
Password policy and Session management both carry an amber "Saved, but not enforced" notice, and they mean it. You sign in with Google or an emailed link, so there is no password for a length or complexity rule to apply to; and your session length and lockout behaviour come from the sign-in provider, not from this panel. The values are stored against a future password sign-in and change nothing today.
To actually end a session, sign the device out on the Devices tab.
Turn on two-factor authentication (recommended)
Because your books hold pay, rates, and tax data, it is worth adding a second layer of protection. Function TimeTrack supports two-factor authentication (2FA) with an authenticator app (TOTP).
- Open Settings → Sign-in & security and find Two-Factor Authentication.
- Click Setup MFA. The first step asks you to confirm your password.
- Scan the QR code with an authenticator app (Google Authenticator, Authy, 1Password, etc.), or type the setup key in by hand.
- Enter the 6-digit code to confirm.
- Save your recovery codes. They are shown once.
Enrolment asks for a password this app may never have given you
Step 2 requires your account password and the button stays disabled until you type one. If you signed in with Google or an emailed magic link — which are the only two ways in — you do not have a password, and there is currently no way past that step.
The same applies in reverse: Disable MFA also prompts for a password.
If MFA Status reads Disabled and the setup dialog will not let you continue, that is this gap, not something you have done wrong. Nothing else about your account is affected.
The QR code is safe to photograph now
The enrolment QR encodes an otpauth:// URI, and that URI contains your shared secret —
anyone who holds it can mint valid codes for your account forever.
This screen used to build the QR by handing that URI to a free public QR-rendering service in a URL query string, where it would land in that service's access logs, in any proxy in between, and in your own browser history. A second factor that a third party has logged is not a second factor.
It is now drawn in your browser, as an SVG computed from the URI locally. No network request, no image host, nobody else's logs. If the encoding ever fails, the screen points you at the manual setup key rather than showing a broken image — because a user whose scanner will not cooperate still has to be able to finish.
Keep your recovery codes
Recovery codes are your way back in if you lose your phone. Store them somewhere separate from your authenticator app — a password manager is ideal. Without them, losing your device can lock you out of your account.
Your profile
Settings → Profile & preferences carries four tabs — Profile, Preferences, Notifications and Account — and sets your name, job title, how the app displays things to you, and when it emails you.
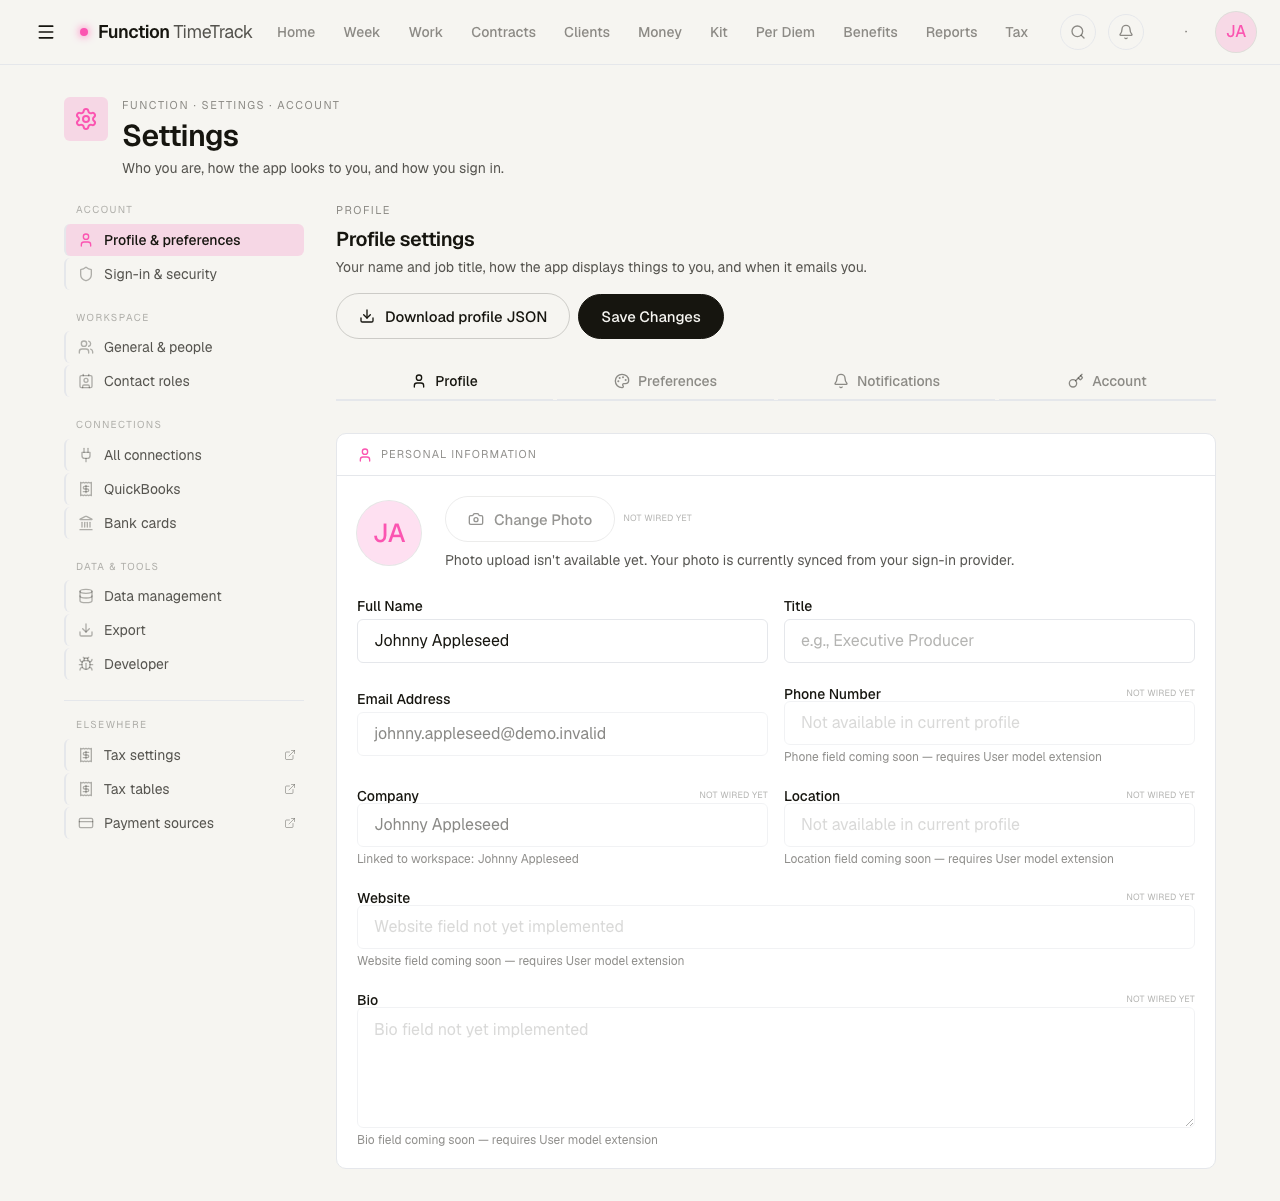
The page labels its own unfinished fields
Change photo, Phone number, Company, Location, Website and Bio each carry a NOT WIRED YET tag and a line saying what is missing. They are visible so the shape of the form is stable, and marked so you do not type into a field that will not keep what you tell it. Your photo comes from your sign-in provider in the meantime.
Full name and Title are real and save normally.
Email address is a third thing again: it is shown, it is correct, and it is deliberately read-only — it comes from the account you sign in with, so it is changed there rather than here. It carries no NOT WIRED YET tag, because nothing is missing.
The notification bell
The bell in the top bar is the app's one place for "something needs you by a date": benefit enrolment windows, claim deadlines, forfeiture dates, estimated-tax dates, and invoice reminders.
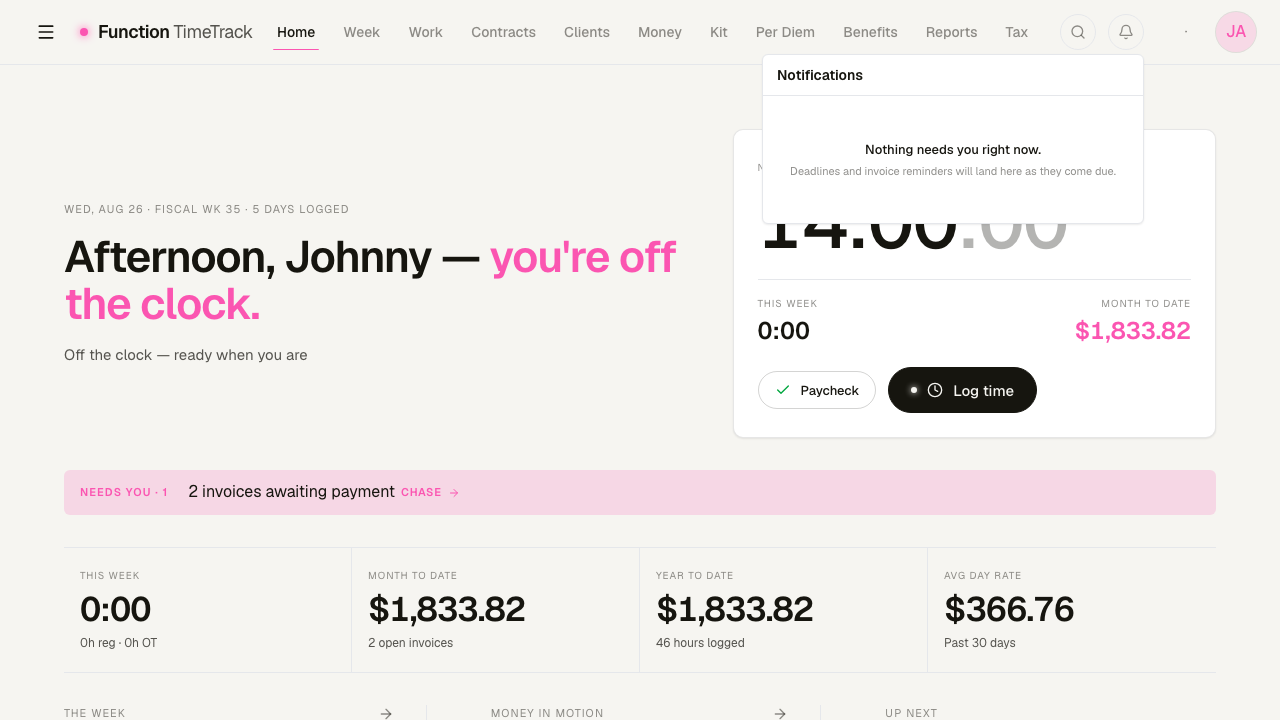
Three things about it worth knowing:
- It shows its work. A deadline notice renders its source — the authority, the quote, when this workspace read it, and a link to go and check. A notice with no recorded source says so rather than borrowing the app's authority.
- It ranks, then caps. At most three rows per pile, with the remainder stated, so a December week that legitimately produces thirty notices still reads as a few lines.
- Dismissing is not deleting. Dismiss marks a notice read. The row stays, because the same table is how the app avoids sending you the same reminder twice.
An empty bell today is correct
Every process that writes notifications ships switched off on this install, so the honest bell is an empty one. "Nothing needs you right now" means exactly that — it is not a spinner, and it is not "no data".
The NEEDS YOU strip on the dashboard is a different mechanism: it is derived live from your books rather than read from stored notices, which is why it can show you two unpaid invoices while the bell is empty. Both are telling the truth about different things.
Step 2 — Get to know your workspace
A workspace is your private space in the app. Everything you create — contracts, weeks, income, expenses, kit, benefit records — belongs to one workspace, and nothing leaks between workspaces.
The good news: you don't have to create one. The first time you sign in, a default workspace is created for you automatically. You can start working immediately.
Naming and regional settings
To make the workspace your own, open Settings → Workspace and use the General tab to set:
- Name — what the workspace is called (e.g. your name, or a company name).
- Short code — a brief identifier used around the app.
- Time zone — used when the app interprets your call times and dates.
- Currency and locale — how money and dates are formatted.
Set your time zone before logging time
Time entries are anchored to the workspace time zone. Setting it correctly up front — before you enter weeks — keeps overnight calls, midnight overtime splits, and day boundaries landing on the right calendar day.
Step 3 — Create your first contract
A contract (the app calls it a Contract Type) is the rulebook the pay engine reads when it prices your week. You need at least one before your logged time can turn into a dollar figure.
You don't have to fill everything in at once. Creating a contract takes only a handful of fields; the deeper terms are added afterward on the contract's own page.
Create the contract
- Open Contracts from the top navigation.
- Click New contract. (If you have none yet, the empty state has its own New contract button.)
- Fill in the create dialog:
- Name — a human name for the deal (e.g. "IATSE Local X — Feature").
- Short code — a brief label for the contract.
- Rate type — Daily, Hourly, or Flat rate. This changes what the base-rate field means (per day, per hour, or a flat total).
- Employment type — W-2 employee or 1099 contractor.
- Base rate — the core number, e.g.
$X/hr,$X/day, or a flat$X.
- Click to create. You are taken straight to the contract's edit page.
Why so few fields to start?
The create dialog captures just enough to price a week immediately — the app seeds sensible defaults for the rest so nothing is broken. You then refine the real terms on the contract page.
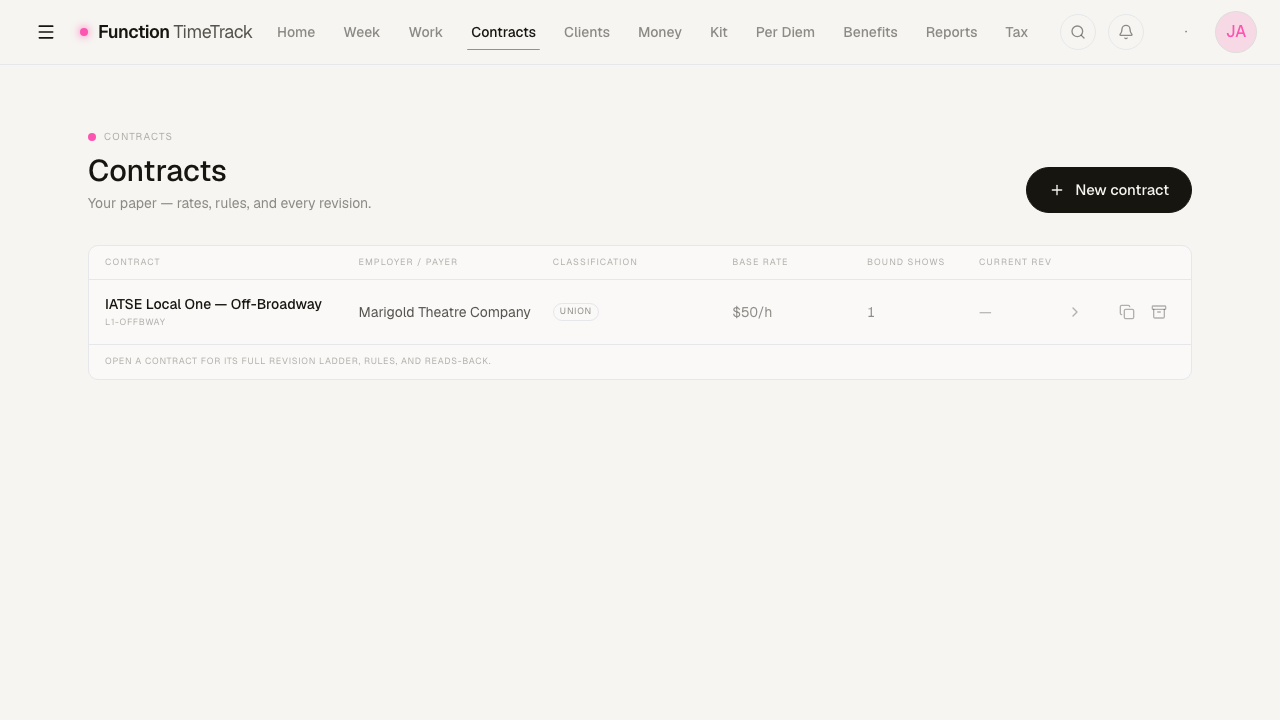
Add the real terms
Once the contract exists, open it (from Contracts → the contract row) to flesh out the terms your deal memo or collective bargaining agreement actually spells out, such as:
- Overtime and premium rules — when straight time becomes overtime or double time.
- Work types — different jobs a single call might be (e.g. a rehearsal day vs. a performance day) when they pay differently.
- Riders — add-on terms layered on top of the base contract.
- Revisions — effective-dated changes so the app prices old weeks with the old terms and new weeks with the new ones.
A worked example to read along with
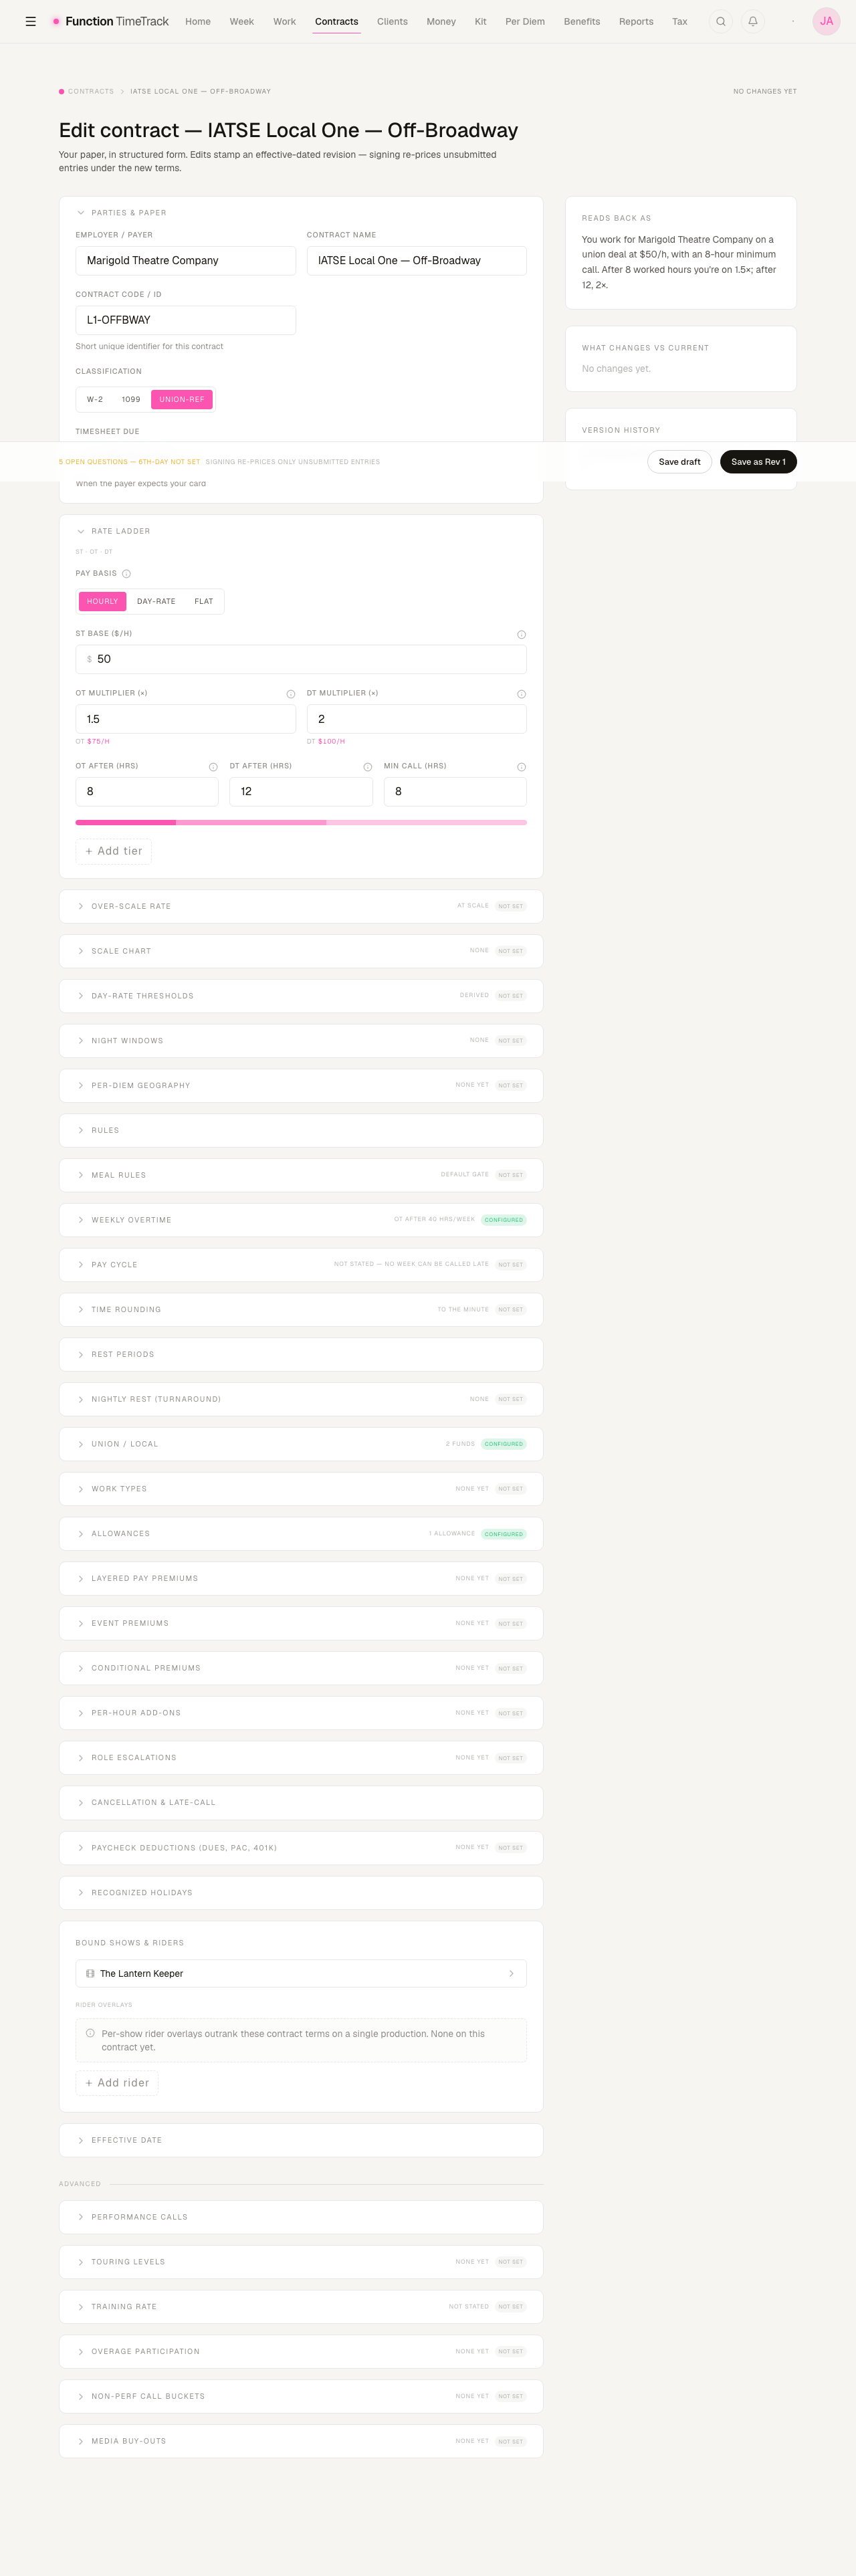
The contract above is the one every screenshot in this guide is priced against: an hourly Local One Off-Broadway deal at $50/h, minimum call 8 hours, overtime at 1.5× after 8, double time at 2× after 12, weekly overtime after 40, and two union funds. The right-hand Reads back as panel restates it in plain English so you can check the app understood your deal the way you do.
Union funds and benefits
If you work under a union Local, your contract can also describe benefit fund contributions (Health & Welfare, Annuity, Pension, Vacation/TET, and so on). Setting these up is covered in Benefits & union funds — do that before you rely on the benefit numbers.
Step 4 — Invite your bookkeeper or team (optional)
If someone else keeps your books — a bookkeeper, business manager, or partner — you can invite them into your workspace instead of sharing a login.
- Go to Settings → Workspace and open the Members tab.
- Click Invite (you must be an Owner or Manager to see this).
- Enter their email and choose a role:
| Role in the invite dialog | What they can do |
|---|---|
| Admin | Create and manage all data in the workspace |
| Member | Add and manage their own work |
| Viewer | Read-only — can view and export, but not change anything |
- Send the invite, or copy the invite link and send it yourself.
The person you invited signs in (with their own Google account), opens the invite link, and clicks Accept to join. Pending invitations show up in the member list until they accept, so you can always see who hasn't joined yet.
Roles, from most to least access
Behind the scenes the roles rank Owner → Manager → Contributor → Read-only. You are the Owner of a workspace you created; the invite roles above map onto Manager, Contributor, and Read-only respectively. Only Owners and Managers can invite new members.
Step 5 — Find your way around
The top navigation is your map. Each tab is a hub for one part of your working life, and most of them carry a row of sub-tabs underneath:
- Home — your dashboard overview.
- Week — where you log the days you worked; the heart of day-to-day use. Sub-tabs: Log now (the one-thumb phone view), Week (the grid), Timesheets.
- Work — every engagement, from a first inquiry to a wrapped show, in one stage-filtered list. Sub-tabs: Engagements, Calendar, Network, Contacts.
- Contracts — your paper: rates, rules, and revisions.
- Clients — your client Directory and the Unions directory.
- Money — Earned, Owed, Paid, Expenses, Invoices, Reconcile, plus Payment Sources and Past-pay review.
- Kit — kit fees, equipment, and inventory.
- Per Diem — Rates and Zones.
- Benefits — Overview and the Quarterly Report.
- Reports — everything you read back after the work is done.
- Tax — Overview, Calculator, Documents, Tax tables, Settings.
Old links still work
Shows, leads, and work plans used to live on three separate pages (Projects, Gigs, and Work Plans). They are now one Work hub. The old addresses still resolve — they forward you to the matching part of Work rather than breaking.
What Home tells you
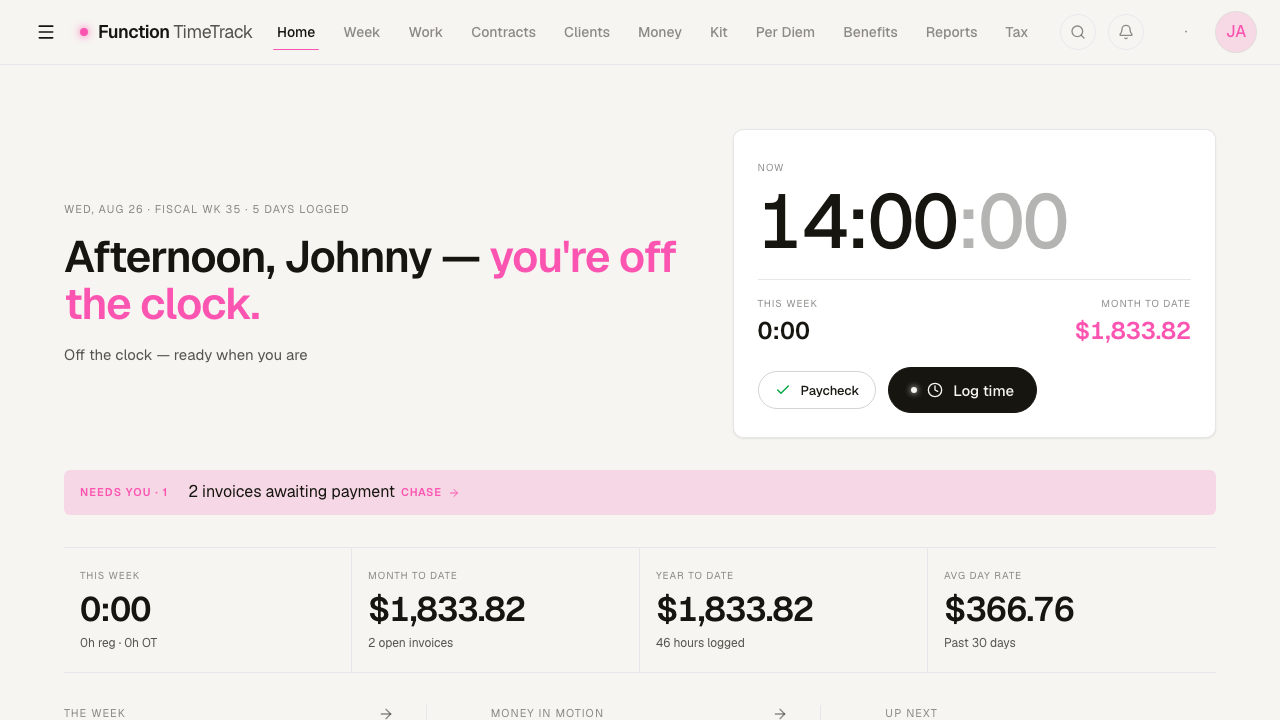
The greeting states the plain facts first — the date, the fiscal week, how many days you have logged, and whether you are on or off the clock. Below it, All clear — nothing needs you right now is a real status, not decoration: when something does need you (an unconfirmed shift, an unsubmitted week, an unpaid invoice) it is named there instead.
Switching between workspaces
Most people only ever have one workspace. If you belong to more than one — for example, your own plus a production company's — a workspace switcher appears in the top navigation. Use it to change which workspace is active; you are always working inside exactly one at a time.
One thing at a time
The switcher does not merge data — it changes context. Whatever workspace is active is the one every page reads from and writes to.
You're set up — what's next
With an account, a named workspace, and at least one contract, the app has what it needs to price your work. From here:
- Log a week — open Week and enter the days you worked. The pay engine derives overtime, premiums, and penalties from your contract.
- Refine your contract — as you confirm deal details, add work types, riders, and revisions on the contract page.
- Set up funds and tax — if you work union, configure your benefit funds; then review your tax settings so estimates are accurate.
Keep going
See Contracts & pay for how the pay engine reads your contract, and Benefits & union funds for setting up fund contributions.
Function TimeTrack Help
Turn the reality of a freelance entertainment week into an accurate, contract-correct paycheck — and everything that flows from it.
Contracts & rate configuration
Create a contract, set its pay basis and rules, and layer on premiums, per-diem, touring levels, deductions, and effective-dated revisions.