QuickBooks Integration
Connect QuickBooks Online to import customers, push timesheets as invoices, send payment links, and keep payment status in sync automatically.
Function Timetrack connects to QuickBooks Online so the money side of your work stays in one place. Once connected, you can pull your existing QuickBooks customers into the app, turn an approved week's timesheet into a real QuickBooks invoice, send that invoice to the client with a secure online payment link, and have the invoice's paid/unpaid status flow back automatically as the client pays.
This guide walks through every task in the order you'll actually do them: connect, match up customers, create invoices, get paid, and keep everything in sync.
This is a one-way-plus-feedback integration. Function Timetrack pushes customers and invoices out to QuickBooks, and reads invoice and payment status back in. It does not rewrite your QuickBooks accounting, chart of accounts, or ledgers.
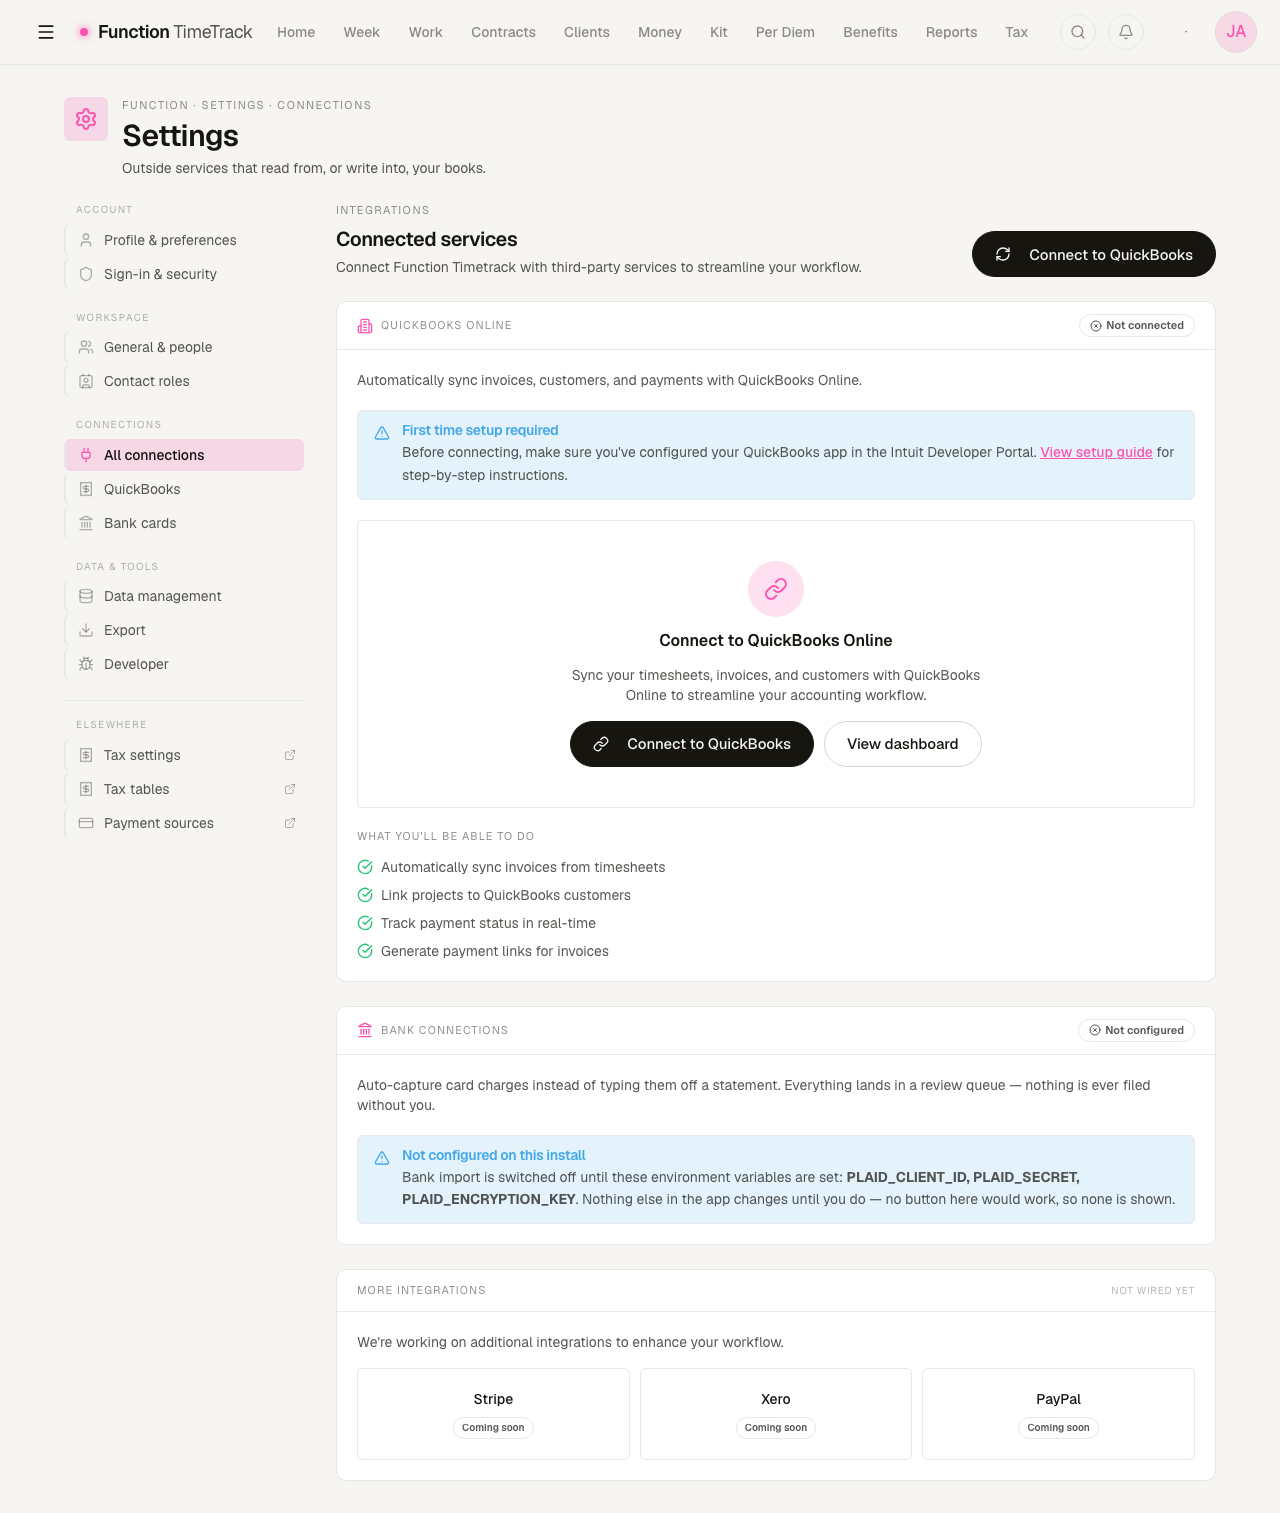
Settings → Connections → All connections is home base. Three things live there:
- QuickBooks Online — this article.
- Bank connections — see Settings & data. It is switched off entirely until three environment variables are set on the install, and the card says which, rather than offering a button that could not work.
- More integrations — Stripe, Xero and PayPal, each marked Coming soon and doing nothing.
Opening QuickBooks in the rail gives the same connection on its own page.
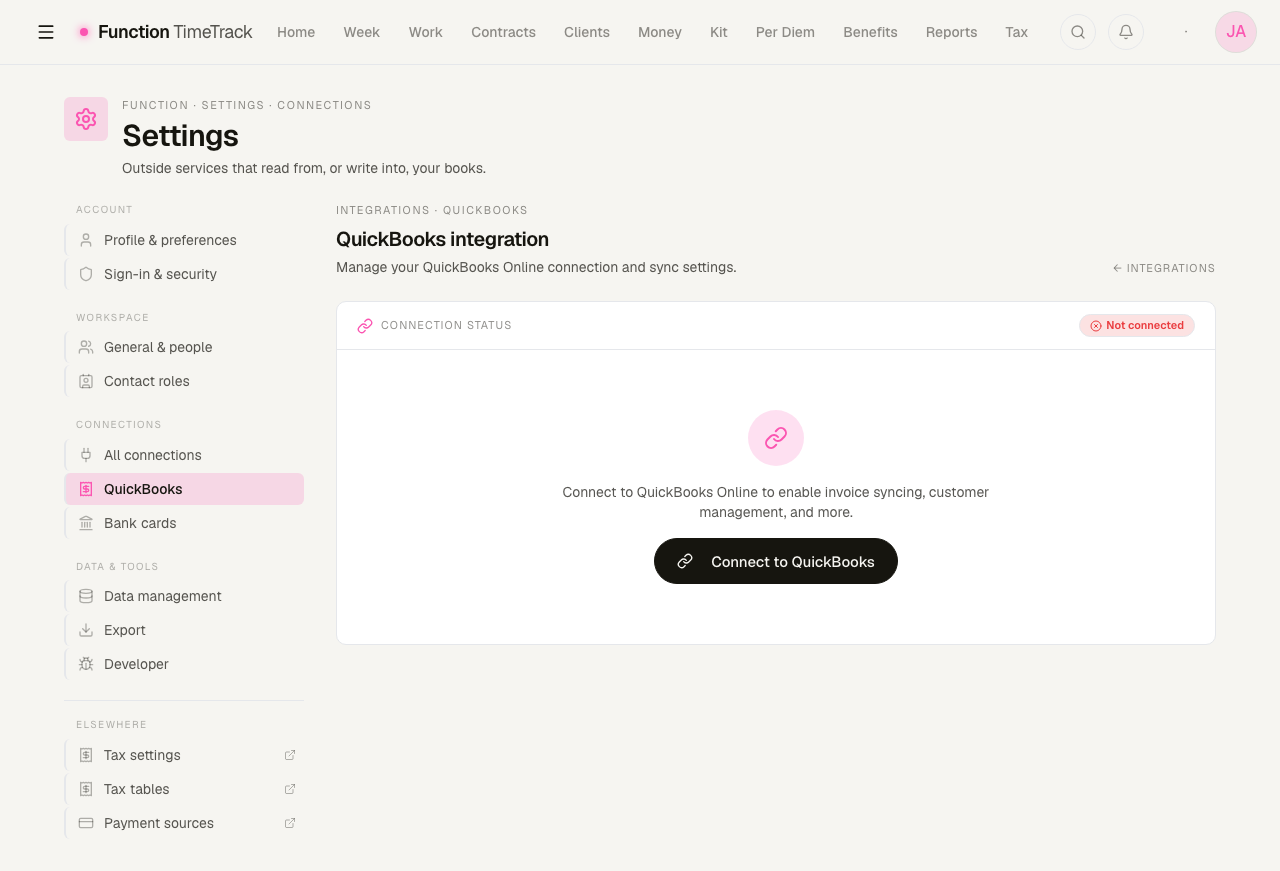
Why the rest of this article has no pictures
Everything past the connection step needs a live QuickBooks Online company to photograph: the connected card with your company name, the customer-matching screen, the invoice preview, the payment-actions panel, the send-email dialog, and the service-item mapping.
The screenshots in this manual are all taken against a local demo workspace with no Intuit credentials, so those screens genuinely cannot be captured here. Rather than mock them up — which would put pictures in the manual of a QuickBooks account that does not exist, with figures nobody can check — the steps below are described in words and the images are left out.
Nine screens are affected: the connected state, the customer sync in progress, the reconciliation dialog, the invoice preview, the payment-actions panel, the send-email dialog, the sync dashboard, the service-item picker, and the entity mapping table. Everything written about them below was read off the code, not guessed.
Before you start
You'll need:
- A QuickBooks Online account you can sign in to (the company you invoice clients from).
- Permission in Function Timetrack to manage workspace settings — connecting affects the whole workspace, not just your personal view.
- Pop-ups allowed for Function Timetrack in your browser. The connect step opens QuickBooks in a small pop-up window; if pop-ups are blocked, the connection can't start.
QuickBooks is connected per workspace. If you work across more than one workspace, you connect (and later disconnect) each one separately. Make sure the workspace switcher shows the right workspace before you connect.
Step 1 — Connect your QuickBooks account
- Go to Settings → Integrations.
- Find the QuickBooks card and click Connect to QuickBooks.
- A pop-up window opens on Intuit's sign-in page. Sign in to QuickBooks and choose the company you want to link.
- Approve the requested access. Function Timetrack asks for access to your accounting data (customers and invoices) and payments data.
- When you approve, the pop-up closes on its own and the Integrations page refreshes. You'll see a success message and the card flips to Connected, showing your company name.
Once connected, the card shows:
- The company name you linked.
- When customers were last synced.
- The health of the connection (an active connection quietly refreshes its own access behind the scenes).
The connection renews itself. Function Timetrack automatically refreshes its access token in the background so you don't have to reconnect every hour. You only need to reconnect if the connection has been idle for a very long time, or if someone revoked access on the QuickBooks side (see Troubleshooting).
If the pop-up is blocked
If nothing happens when you click Connect, your browser probably blocked the pop-up. Allow pop-ups for the site and try again — you'll usually see a small blocked-pop-up icon in the address bar.
Step 2 — Bring your customers together
Your clients live as customers in QuickBooks. Function Timetrack needs to know which local customer maps to which QuickBooks customer so invoices land on the right account. There are two ways to line them up.
Import and auto-match
From the Integrations page (while connected), click Sync customers. Function Timetrack imports your QuickBooks customers and tries to auto-link them to matching local customers. When it finishes, you'll see how many customers were imported.
Review and confirm matches
When matches aren't obvious, the Match Customers with QuickBooks reconciliation screen walks you through them one at a time. For each Function Timetrack customer it shows the closest QuickBooks candidates, each with a confidence badge and the reasons it matched (name, email, phone, company):
- High Match — very likely the same customer.
- Possible Match — probably, but eyeball it.
- Low Match — weak; only link if you recognize it.
For each customer you choose one of three actions:
- Link to Selected Match — ties this local customer to the highlighted QuickBooks customer.
- Create New in QuickBooks — no good match exists, so make a fresh QuickBooks customer from this one.
- Skip — leave it unlinked for now.
A progress bar tracks how far through the list you are, and Skip All Remaining bails out of the rest if you only cared about the first few.
A high-confidence match is auto-selected for you — if it's right, you can just click Link and move on. Take the extra second to read the "Why this matches" reasons before linking a Possible or Low match.
A project needs a linked QuickBooks customer before its invoices can go to the right place. If you try to invoice a project whose customer isn't linked, the invoice preview will warn you that no customer is attached.
Step 3 — Create an invoice from a timesheet
This is the payoff: turn a week you've already priced into a QuickBooks invoice without re-typing a thing.
Requirements
- The timesheet must be approved. The Create Invoice button is greyed out until then — hovering it reads "Timesheet must be approved first."
- The project should have a linked QuickBooks customer (see Step 2).
How to do it
-
On an approved timesheet, click Create Invoice.
-
An Invoice Preview opens. Review the line items — Function Timetrack breaks the week down into the categories it billed:
- Regular Hours
- Overtime
- Double Time
- Penalty (meal/turnaround penalties)
- Kit Fee
- Per Diem
Each line shows quantity × rate = amount, with a subtotal, any tax, and the total.
-
Confirm the customer shown is correct. If a warning says no QuickBooks customer is linked, close the preview and link one first (Step 2).
-
Click Create Invoice in QuickBooks. On success you'll get a confirmation with the new QuickBooks invoice number, and the timesheet's button changes to Invoiced.
Once a timesheet has been invoiced it shows Invoiced and the button is disabled, so you can't accidentally bill the same week twice.
The preview uses whatever the timesheet was priced at. If the numbers look wrong, fix the timesheet first — don't create the invoice and correct it in QuickBooks, or the two systems will disagree.
Step 4 — Send the invoice and get paid
Once an invoice exists in QuickBooks, the Payment Actions let you collect on it. They live on the invoice and only appear once the invoice is synced to QuickBooks.
Generate a payment link
Click Generate Payment Link. Function Timetrack creates a secure, QuickBooks-hosted payment page for the invoice and automatically copies the link to your clipboard. You can then:
- Copy Link — copy it again any time.
- Open in new tab — preview the exact page your client will see.
Email the invoice to your client
Click Send Invoice Email to open the email dialog:
- Customer Email — pre-filled from the QuickBooks customer record; edit if needed.
- CC (optional) — add extra recipients, separated by commas (e.g. a bookkeeper).
- Custom Message (optional) — a personal note added to the email.
The email your client receives includes the invoice summary and line items, the amount due and due date, the secure payment link, and your company branding.
You must generate the payment link before sending the email — the send button will tell you if there's no link yet. A valid recipient email is also required.
Step 5 — Keep payment status in sync
You have two ways to know when an invoice gets paid.
Automatic (the normal case)
Function Timetrack listens for updates from QuickBooks and keeps invoice status current on its own. Status maps like this:
- Balance is zero → Paid (the paid date comes from the last payment recorded in QuickBooks).
- Partly paid (some balance, but less than the total) → Partially Paid.
- Past its due date and still owing → Overdue.
- Emailed but not yet paid → moves a Draft to Sent.
Each invoice shows a status badge: Paid, Unpaid, Partially Paid, or Overdue.
Manual — Sync Payment Status
If you want to check right now, click Sync Payment Status on the invoice's Payment Actions. Function Timetrack fetches the latest from QuickBooks and updates the badge and paid date on the spot.
Use Sync Payment Status when a client tells you "I just paid" and you want the app to reflect it immediately instead of waiting for the automatic update.
Change Data Capture (CDC): the background sync
Beyond individual invoices, Function Timetrack runs a background Change Data Capture sync that watches for changes in QuickBooks across three kinds of records:
- Invoice
- Customer
- Item (your service/line-item catalog)
The CDC status panel shows, per record type:
- When it last synced (e.g. 5m ago).
- How many records were processed and how many changed.
- A health badge — Active, Error, or Disabled — with error details if something went wrong.
Click Sync Now to run a sync. The panel auto-refreshes about once a minute.
CDC is run by hand, not on a timer. The panel's own copy says it syncs hourly, but nothing schedules it — Sync Now is the only thing that triggers a run. Press it when you want QuickBooks changes pulled in; don't assume it has happened on its own.
CDC is most useful as a health check: if a record type shows Error, that's your signal something needs attention (often a reconnect). The individual invoice actions — push, payment link, email, Sync Payment Status — do not depend on it.
Map your rate codes to QuickBooks service items
QuickBooks prices invoice lines against its service items. So that a pushed invoice lands on the right item instead of a generic line, map each of your rate codes to one.
- Go to Settings → Integrations → QuickBooks.
- On the Service items panel, click Manage mappings.
- Add a mapping: pick a rate code, pick the QuickBooks service item it corresponds to, save.
- Search, edit, or delete mappings from the same table; each row shows its sync status.
Unmapped rate codes still invoice — they just won't carry a service item into QuickBooks.
Disconnecting QuickBooks
To unlink a workspace from QuickBooks:
- Go to Settings → Integrations.
- On the QuickBooks card, click Disconnect and confirm.
Disconnecting stops automatic invoice syncing and revokes Function Timetrack's access on the QuickBooks side. Your already-created invoices and imported customers stay in place — you just lose the live link until you reconnect.
Disconnecting stops automatic invoice syncing. Reconnect any time from the same card; you'll go through the sign-in and authorize steps again.
Troubleshooting
"Please reconnect your QuickBooks account"
This means the long-lived connection expired or was revoked in QuickBooks (for example, someone removed the app from the QuickBooks company's connected apps, or it sat unused for a very long time). Go to Settings → Integrations and click Connect to QuickBooks to re-authorize.
The Connect pop-up didn't open
Your browser blocked it. Allow pop-ups for Function Timetrack and click Connect again.
"Redirect URI configuration error"
This is a setup-level problem with how the QuickBooks app is configured, not something you did wrong in the moment. Contact whoever administers your Function Timetrack setup — the QuickBooks app's redirect settings need to be corrected.
The Create Invoice button is greyed out
The timesheet isn't approved yet. Approve the week first, then the button becomes available.
The invoice preview warns there's no customer
The project isn't linked to a QuickBooks customer. Run Sync customers and link the right one (Step 2), then try again.
A payment link won't send by email
Generate the payment link first — the email needs it. Also confirm the recipient email address is filled in.
"Please wait N seconds before retrying"
If a connection has repeated trouble refreshing, Function Timetrack briefly slows down retries to avoid hammering QuickBooks. Wait the suggested time and try again; if it persists, reconnect.
When in doubt, the Integrations page and the CDC status panel are your two dashboards — the first tells you whether you're connected, the second tells you whether syncing is healthy.
Reports & exports
Read back your year — profitability, rate realization, earnings and withholding, union funds, per-production breakdowns, penalty compliance, and PDF documents — all from the Reports hub.
Settings — data, bank cards & vocabulary
Three settings surfaces that are easy to miss — connecting a bank card so charges import themselves, managing the contact-role words your workspace uses, and the data-management page, most of which is honestly not built yet.